Swagger - Design and Document your APIs!


Hello folks, let's learn something new today. Some of you might have stumbled onto this blog and some might have heard about Swagger and would be wanting to know more. In either case I promise, after reading this blog, you would have increased your knowledge about Swagger and how it can help you create and document your APIs.
What is Swagger? How does Swagger help in making and documenting APIs and what other things can it do? How do I write a Swagger API as a beginner? Is OpenAI specification different from Swagger specification? What is API schema and how to make one using Swagger? Let's get to the answers, now!
Swagger is an Open-Source API documentation framework. It is used for documenting REST APIs. It provides HTML view of the API documentation with JSON support and detailed information on the HTTP methods. Swagger documentation helps frontend developers know what are the endpoints, what data needs to be passed, which methods can be used, if authentication is required or not, if there are any other necessary/optional parameters to the endpoint. Developers get to know what the API is all about and hence it becomes easier to understand and test the API they are working with.
The OpenAPI Specification, formerly known as the Swagger Specification, is the world’s standard for defining RESTful interfaces. The OAS enables developers to design a technology-agnostic API interface that forms the basis of their API development and consumption.
Swagger API was created by Tony Tam in 2011. In 2015 a new organization named Open AI initiative was formed and in 2016 Swagger specification was given a new name of OpenAPI specification. Swagger consists of the tools provided by the SmartBear company and OpenAPI refers to the API specification defined and maintained by the Open API initiative.
The Swagger Editor is an easy way to get started with the OpenAPI Specification to design, describe and document our API. Let's create a simple API with OpenAPI specification.
On your right is the Swagger UI tool and on the left is the space where we'll be writing some code. Let's dive right in....
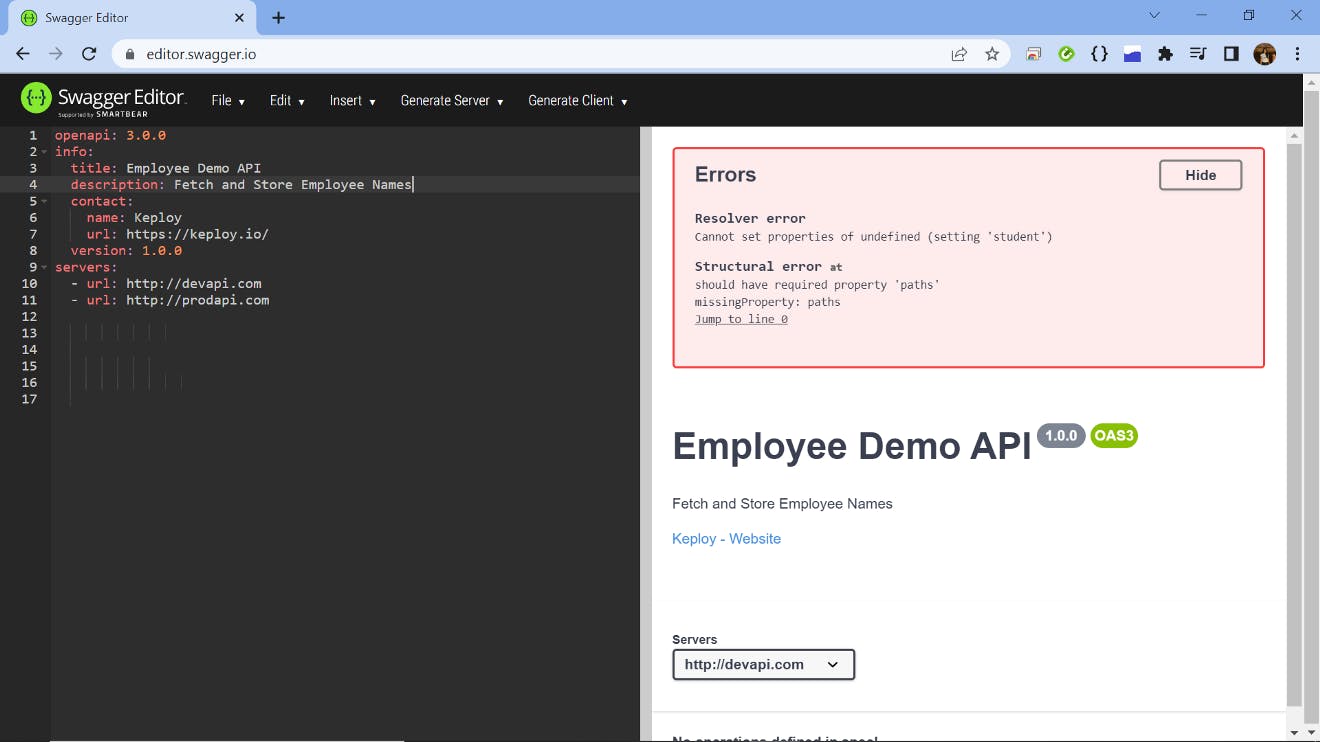
Here, we first specify the version of OpenAI that we are using. Then under info, we specify the title of our API, a short description of it's functionality, a contact to know more about the API and also what is the version of our API that we're currently building. We also specify the servers our API can be accessed from and by. Ofcourse, I've specified just dummy servers for now.
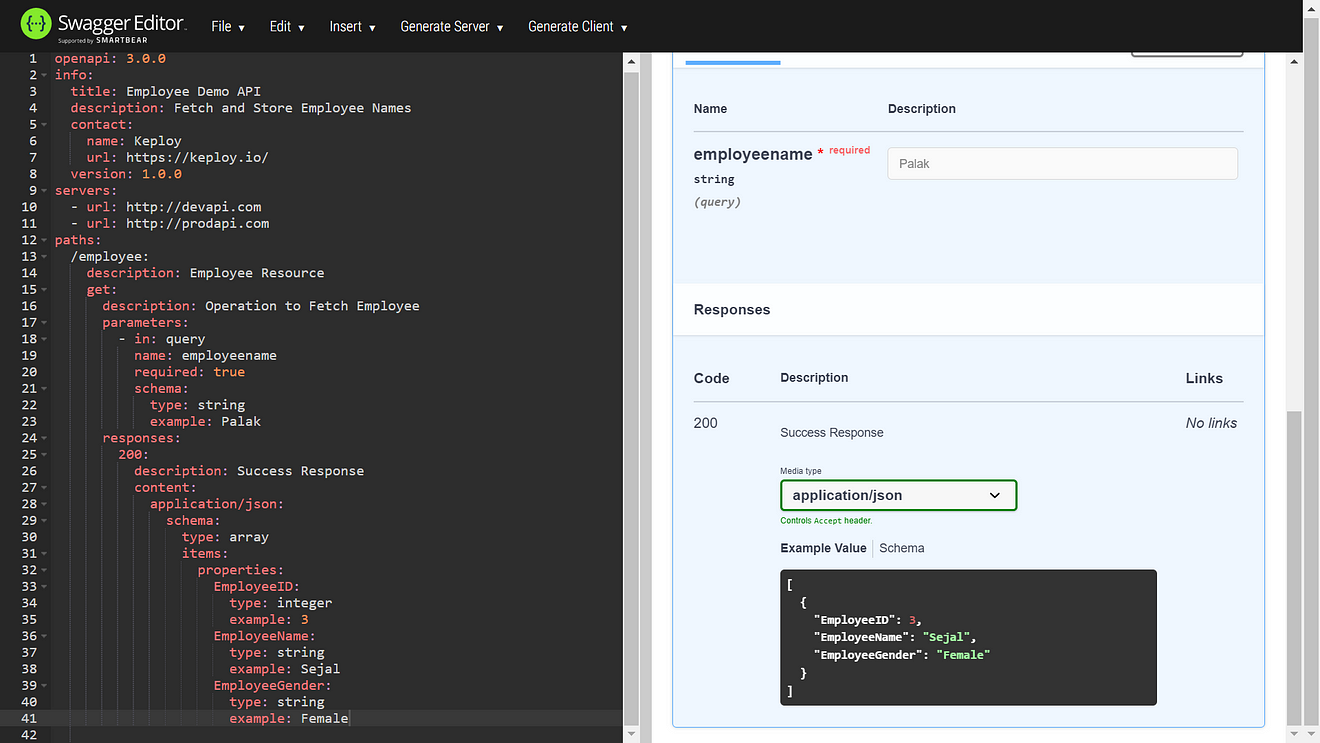
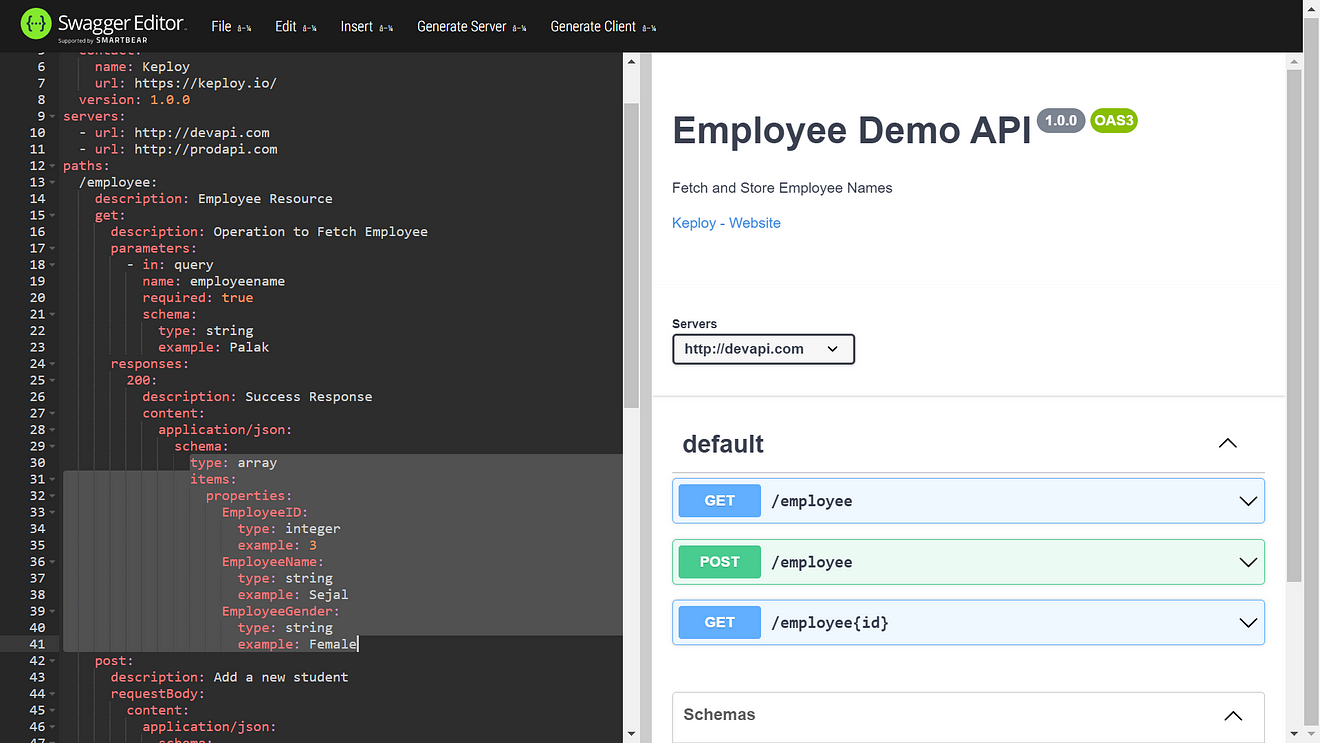
Now we specify the paths, where we add resource and the operations as well. So we add description to the path and first add the GET operation, for which we specify it's description, parameters and responses. So we choose that it's going to be a query parameter, give it a name and specify that this is required. In the schema, we specify the type of the parameter and give a sample example.
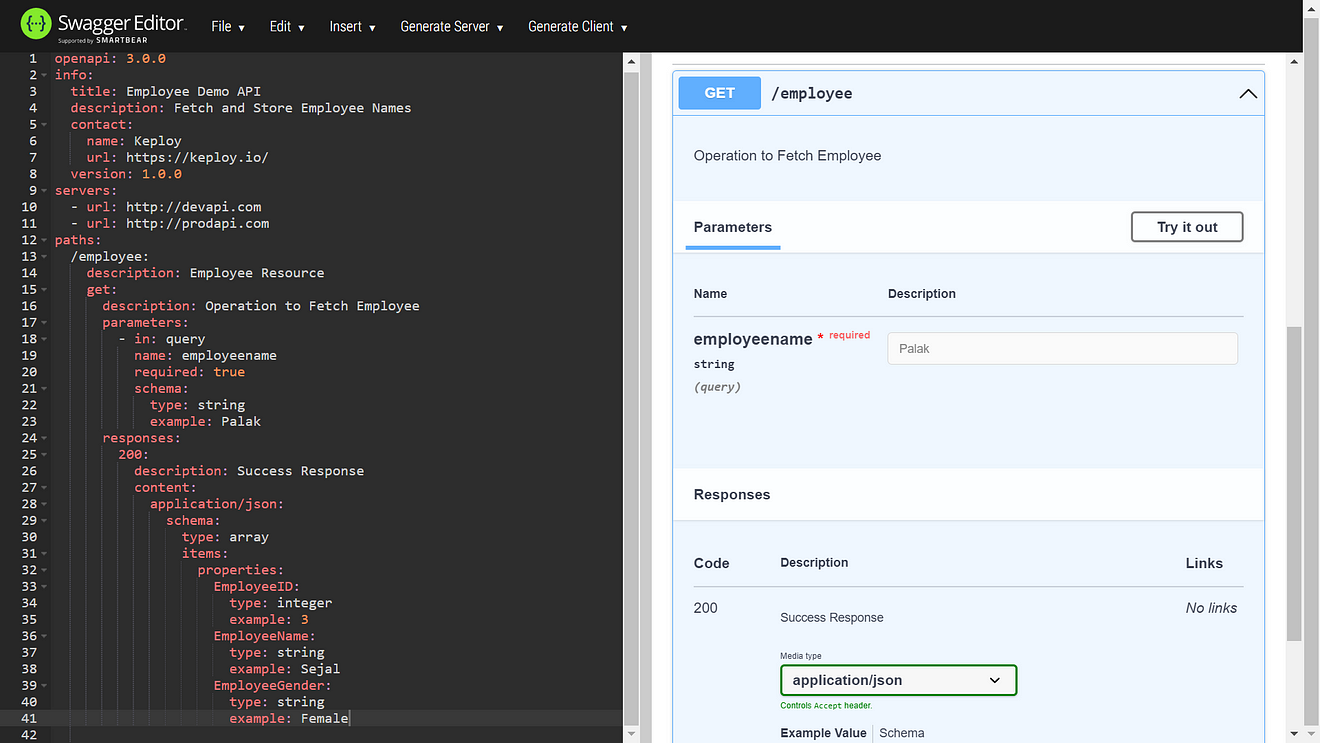 In the responses, we add a simple 200 response that implies a Successful response. Then, we define the content to be JSON and add schema of the response. There are two ways to define the schema or the details of the payload, one is to define it within the operation and the other is to make separate components and then refer it in the operation. The second way is better since it's more reusable and we will learn about it towards the end of this blog. For now let's go ahead with the first way and specify type as array since we're expecting an array of employees. We also need to define the properties of each item, which in our case includes EmployeeID, EmployeeName and EmployeeGender. We specify the type of each property and also provide an accompanying example.
 Great, now we can see on the right the GET operation is expecting Employee Name. Now that we have our GET operation in place, let's write our POST operation too. For this we add a description, the request body and the responses as well.
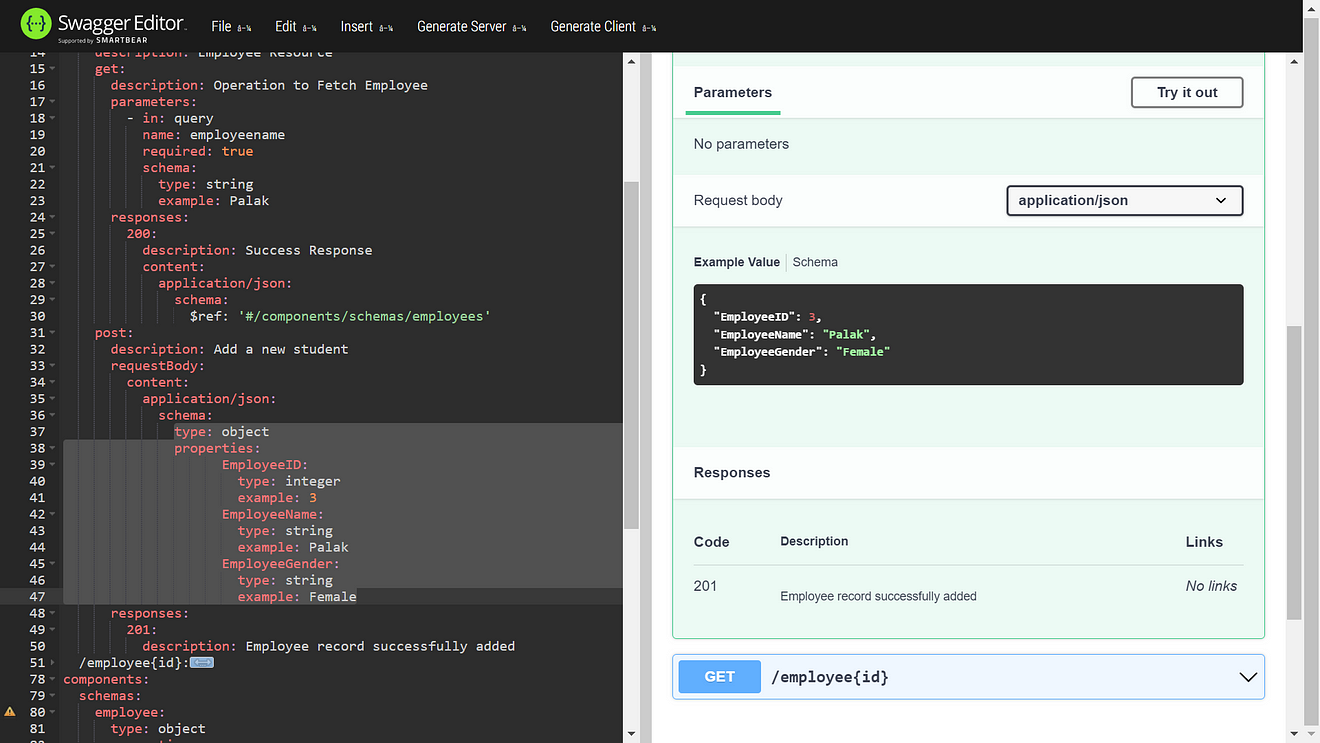
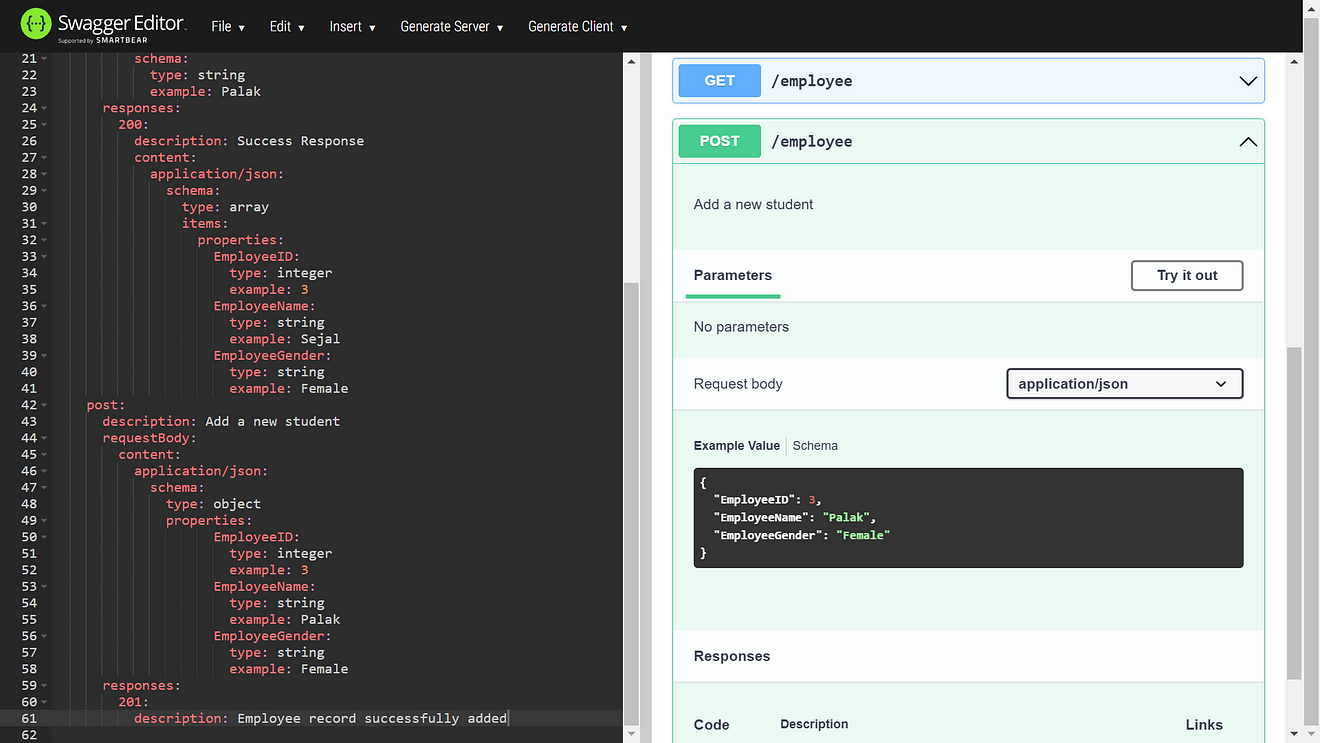 The request body will have the content specified as JSON and the schema will have same properties like what we defined for our GET operation but here the type will be object since we would send only one employee record data to be added.
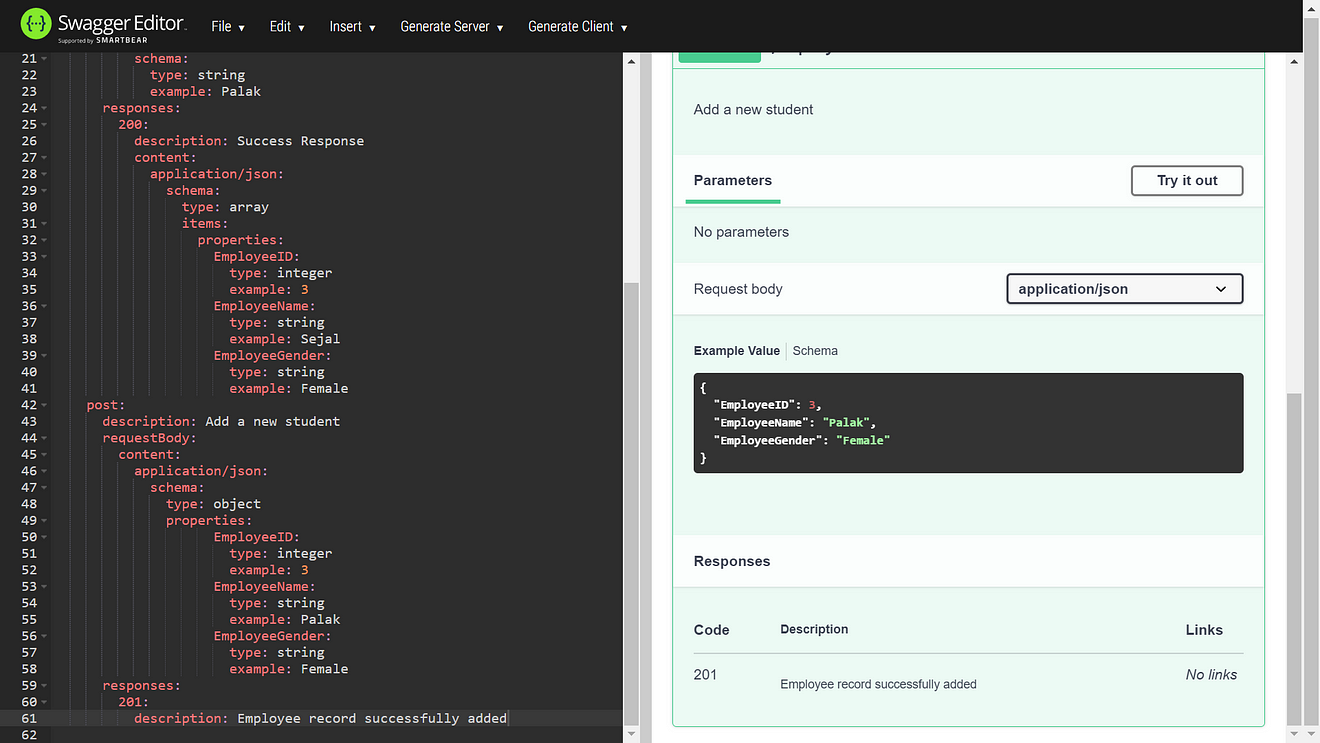 We add 201 under responses which indicates that the request was successful and the employee name has been added. Wuhoo, on the right you can see the POST operation is expecting a JSON as a request body. We are getting our employee resource as a query parameter but what if we want to get it as a path parameter.
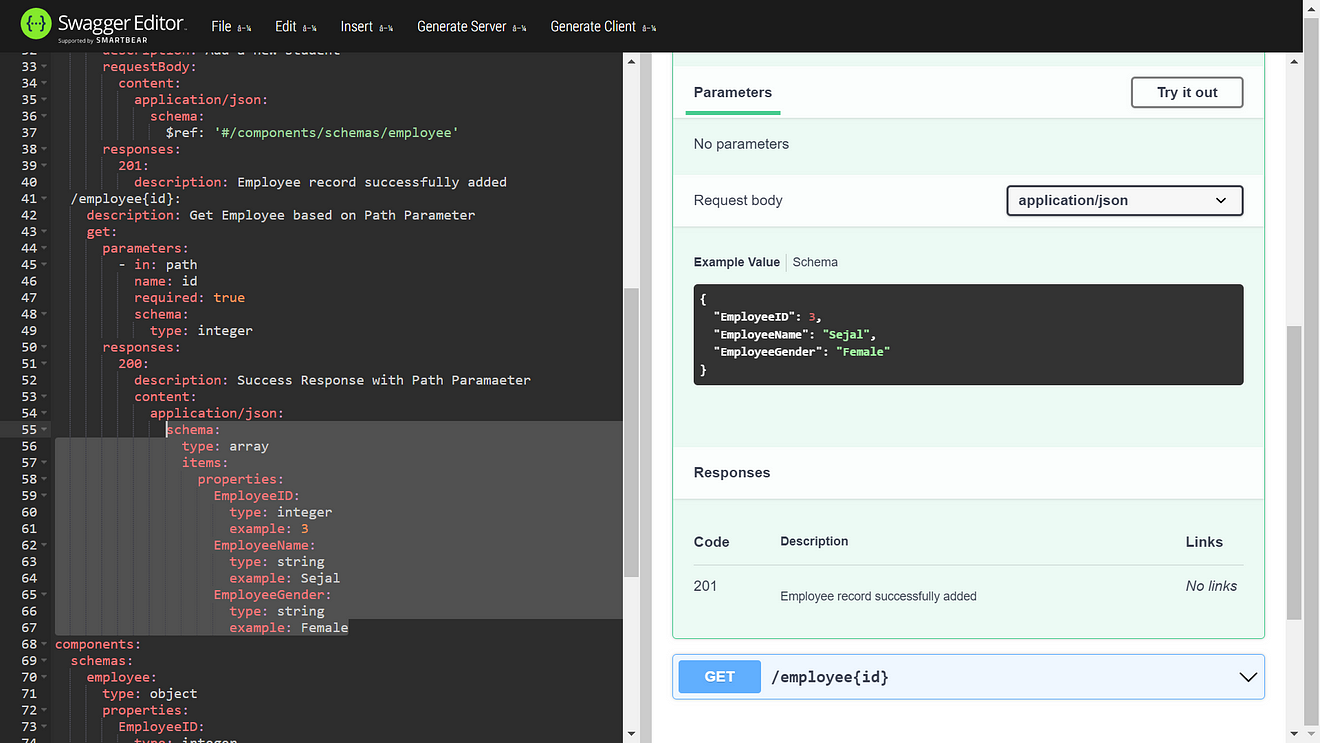
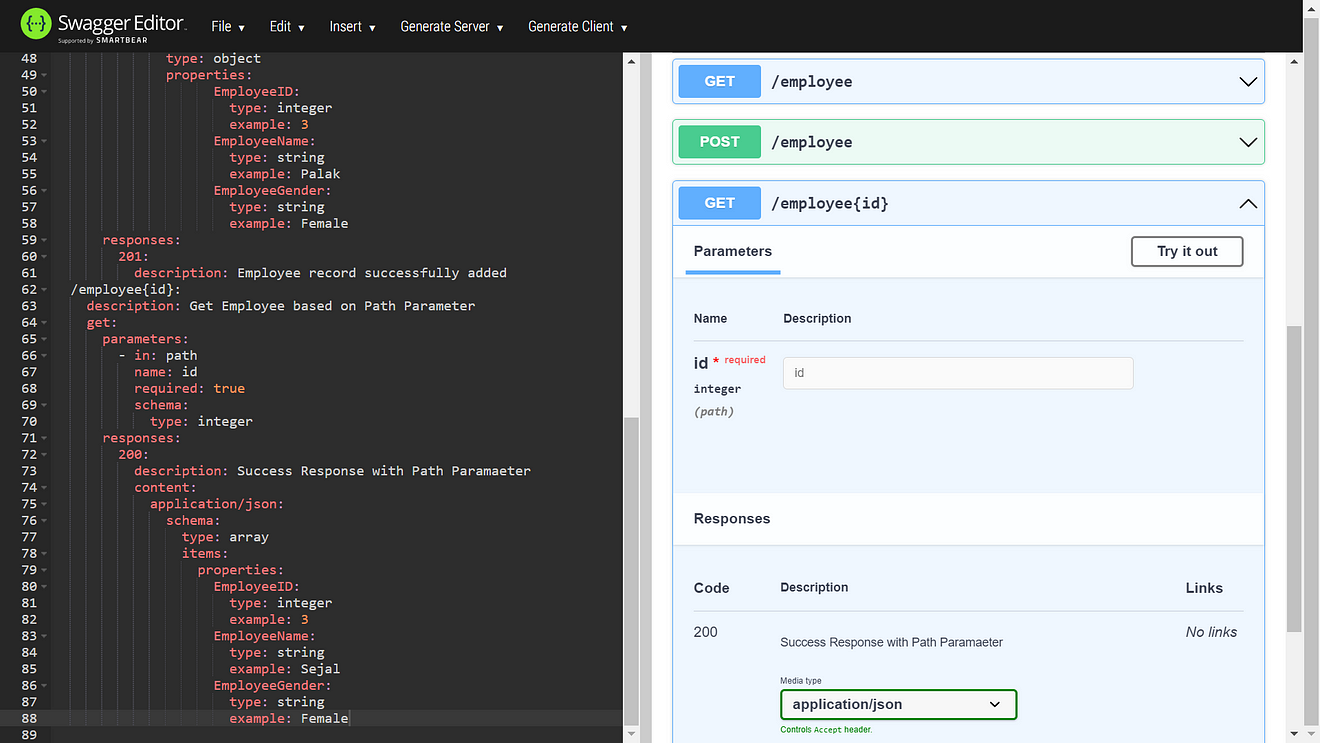 Here, we retrieve the employee through the Path parameter. In this GET operation we include the parameters and responses like we did in our GET operation earlier in the Query Parameter. The only difference here would be under the parameters' "in" we would specify "path" instead of "query" like we did earlier.
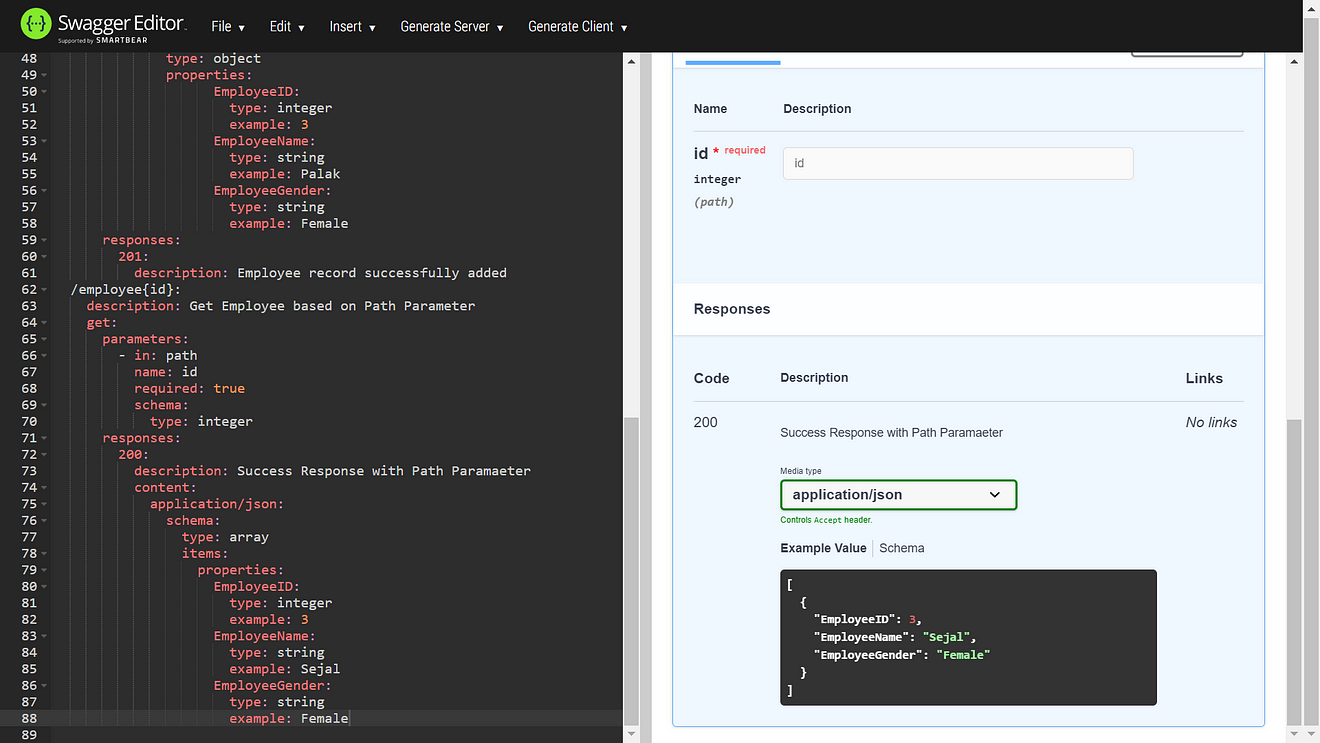 Amazing, our API is complete now. We can see employee GET operation with PATH parameter expecting Employee id. Now our API is complete but we can do some optimizations by using API schemas instead of writing request and response schemas repeatedly. API schemas help developers interact with an API and it's standardization helps in automating the integration process.
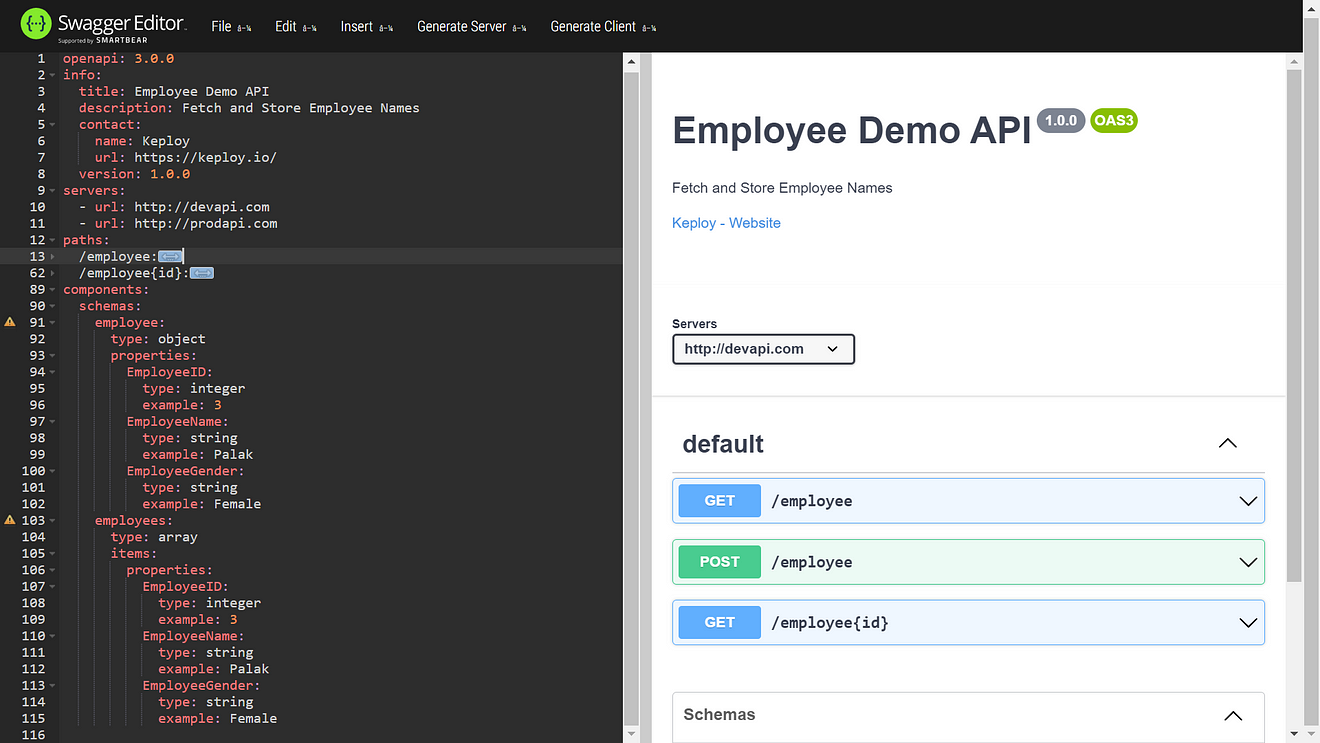 So in our root level we write our components, under which we define the two type of schemas a single employee object and an array of employees. After writing the type, just copy-paste the properties from above for each schema. We have defined two schemas inside our components. If you hover over the yellow error on the left side, you'll see it says "Definition was declared but never used in this document". This is because we've created schemas but have never referenced them in our code above. Let's do that now!
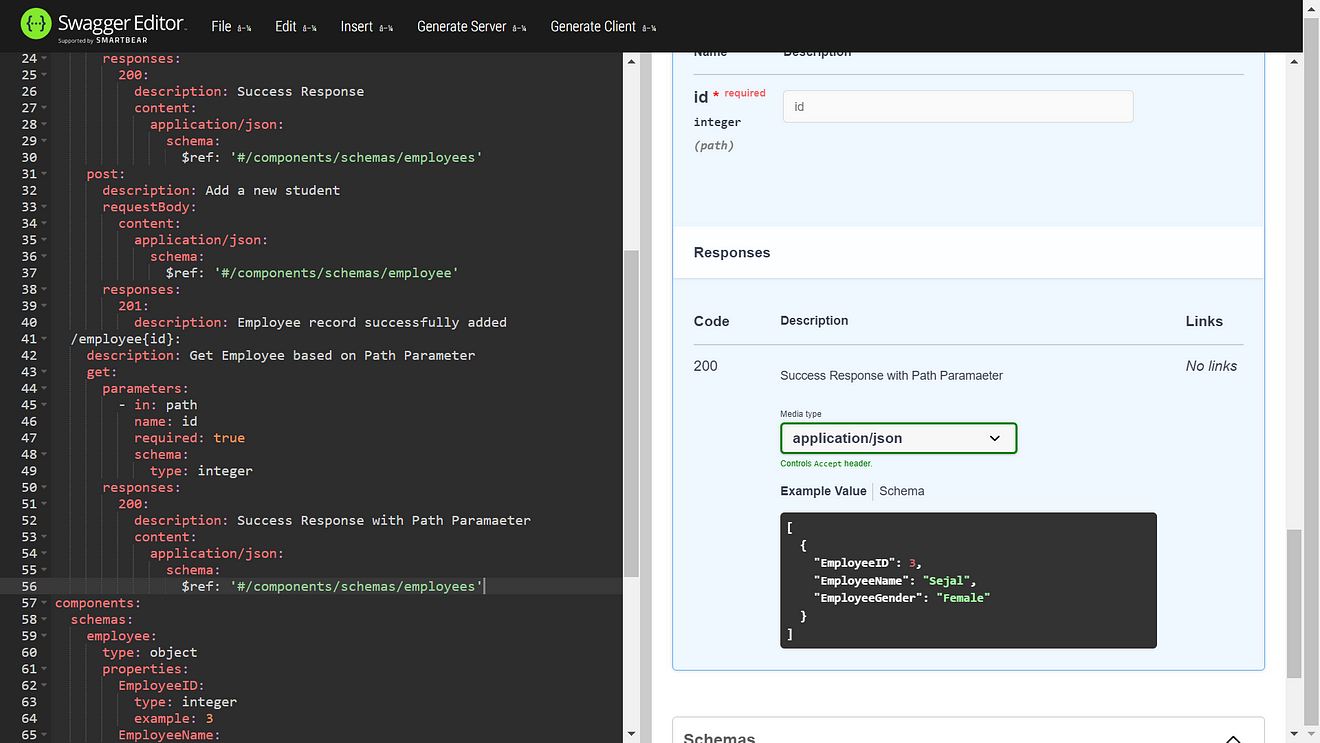
 Now going on to the Employee Resource GET operation, we can remove the part under schema highlighted in the picture above and instead use "$ref" to provide it the reference path of employees schema.
$ref: '#/components/schemas/employees'
 Similarly, go to the Employee Resource POST operation, and under schema use "$ref" to provide it the reference path of employee schema.
$ref: '#/components/schemas/employee'
 Similarly, go to the Path parameter Employee Resource GET operation, and under schema use "$ref" to provide it the reference path of employees schema.
$ref: '#/components/schemas/employees'
 Now all of our operations are referring to the required schema of our API and we have successfully reduced code repetition. We can now see that the documentation on the right in the Swagger UI tool is very helpful to understand our API and it's methods in it's entirety. Voila... your API created and documented on Swagger is ready to be shown to the world now!
For any feedback or doubts, please feel free to comment below. Happy Learning! :)